Adding a New Role in Zeninbox
Learn how to create and assign custom roles in Zeninbox to manage team permissions and responsibilities effectively.
Written By lucidgrowth
Last updated Over 1 year ago
Introduction
The Add Role feature in Zeninbox allows administrators to create new roles with specific permissions tailored to the needs of different team members. This ensures that users have access only to the functionalities they need, enhancing security and productivity. This guide walks you through the steps to add a new role and explains each permission in detail.
Prerequisites
Access Level: Only users with Admin permissions can create new roles.
Important Note: Consider the scope of each permission carefully before assigning them to roles, as they control access to sensitive features and data.
Step-by-Step Instructions
Adding a New Role
Log in to your Zeninbox account with admin credentials.
Navigate to the Settings icon in the lower-left corner of the sidebar.
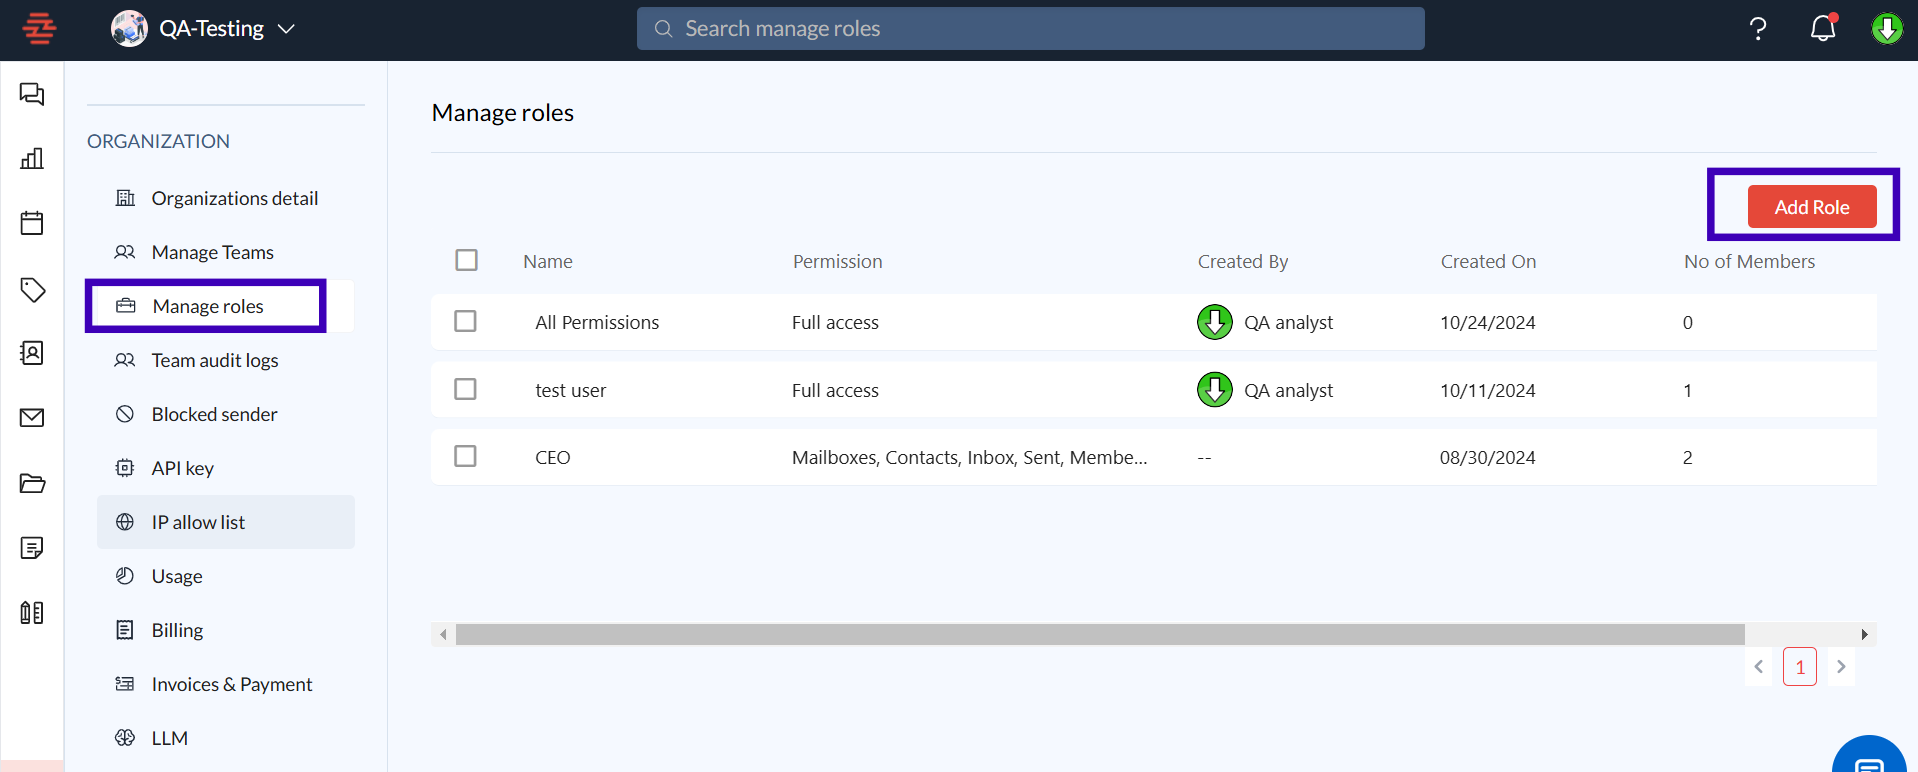
Select Manage Roles under the ORGANIZATION section.
Click on the Add Role button in the upper-right corner.
Fill in the Role Name and Description:
Role Name: Use a descriptive name that reflects the responsibilities of the role (e.g., "Sales Manager").
Description: Briefly describe the purpose of this role for easy identification.
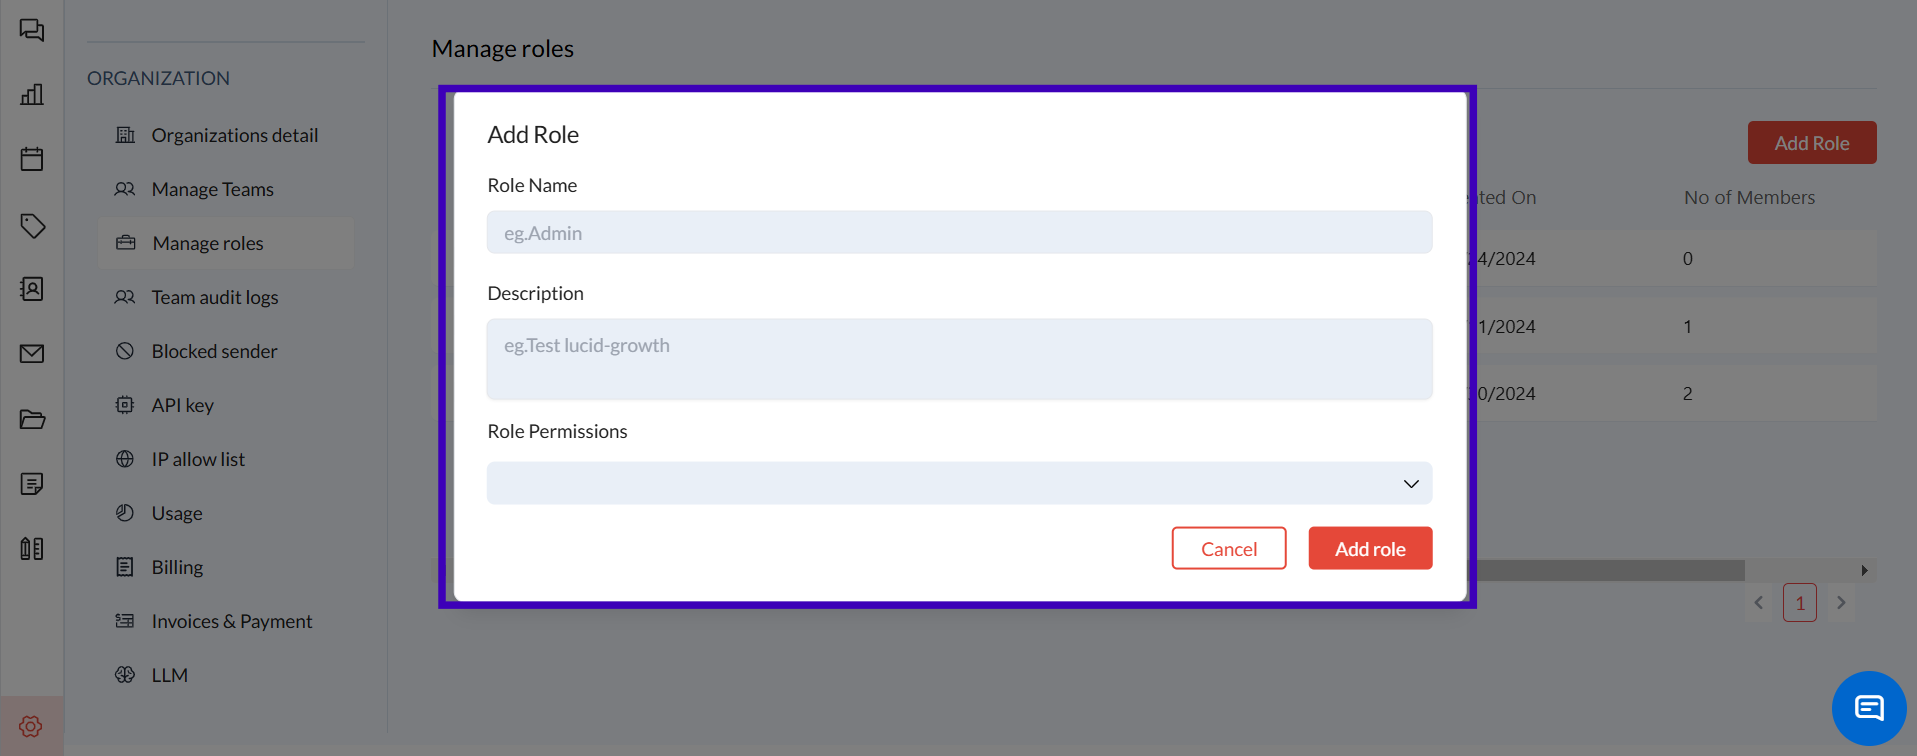
Set Role Permissions: Assign specific permissions by selecting from the available options. These permissions control what actions the role can perform within Zeninbox.
Detailed Explanation of Permissions
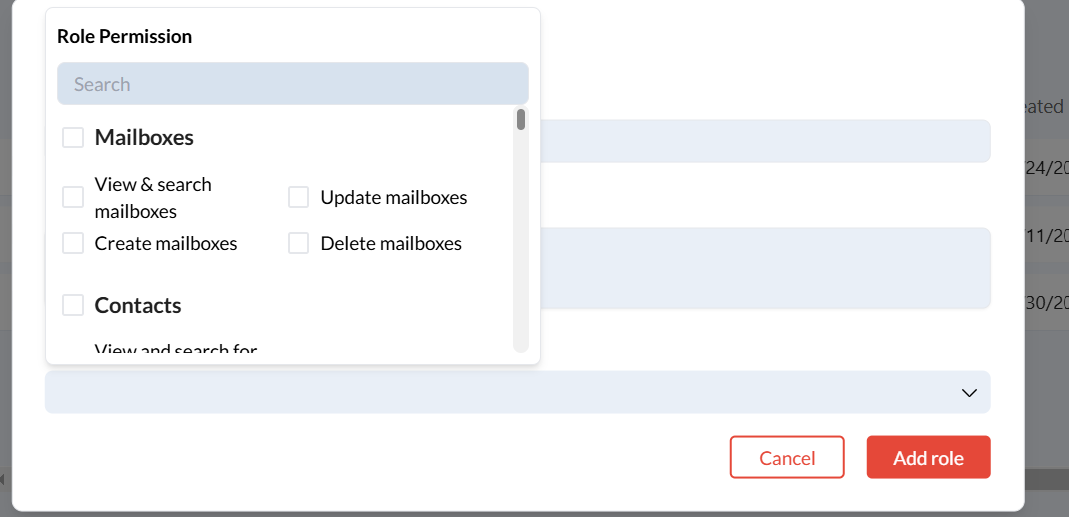
1. Mailbox Permissions:
View & Search Mailboxes: Allows the role to view and search across mailboxes.
Update Mailboxes: Grants the ability to modify existing mailbox settings.
Create Mailboxes: Enables the creation of new mailboxes within the organization.
Delete Mailboxes: Allows the role to delete mailboxes.
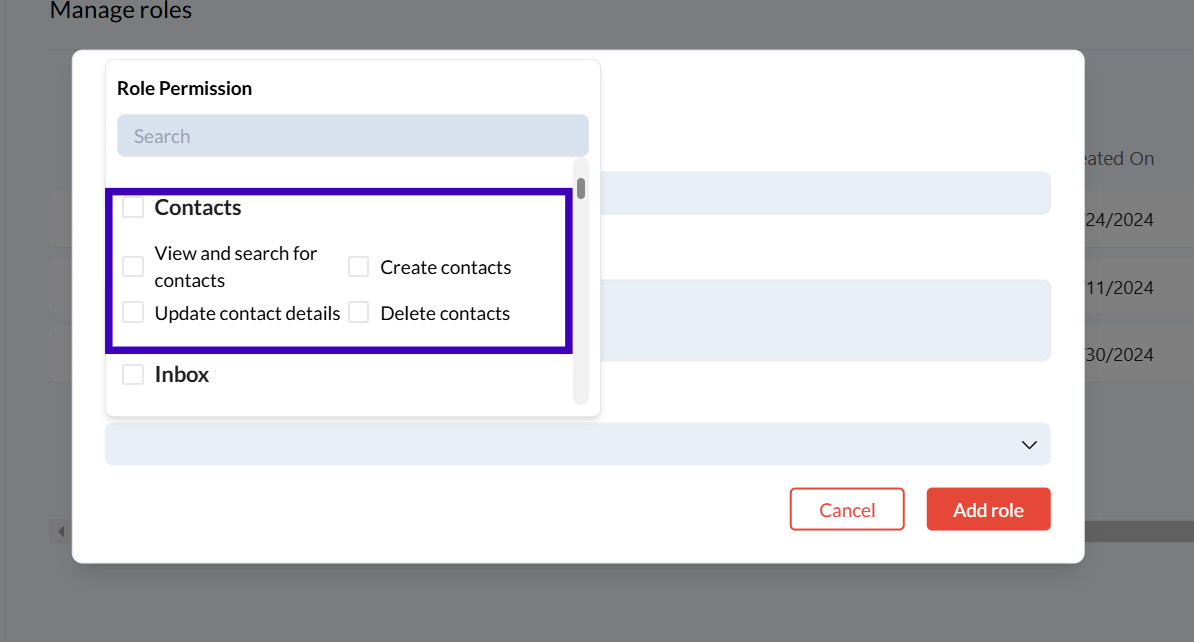
2. Contacts Permissions:
View and Search Contacts: Permits viewing and searching through the organization's contact list.
Update Contact Details: Allows the role to edit existing contact information.
Create Contacts: Enables the addition of new contacts to the system.
Delete Contacts: Allows the role to remove contacts from the system.
3. Inboxes and Labels:
Add Labels in Master Inbox Emails: Grants the ability to add labels to emails in the main inbox.
Remove Labels from Master Inbox Emails: Allows the removal of labels from emails in the main inbox.
Update Labels, Snooze, Archive: This enables updating labels, snoozing emails, or archiving conversations in the inbox.
4. Sent Mail Management:
Add Labels in Master Sent Emails: Allows adding labels to emails in the sent folder.
Remove Labels from Master Sent Emails: Permits the removal of labels from sent emails.
5. Templates:
View Templates: Allows access to view email templates.
Update Templates: Enables editing existing templates.
Create Templates: Grants permission to create new email templates.
Delete Templates: Allows deleting unwanted templates.
6. Labels:
View Labels: Allows the role to view existing labels.
Update Labels: Enables the modification of label settings.
Create Labels: Grants the ability to create new labels.
Delete Labels: Allows deleting labels that are no longer needed.
7. Drive and Document Management:
View Inbox Documents: Allows access to documents saved in the inbox.
View Asset Documents: Grants the ability to view shared assets.
Share Files/Folders: Enables the sharing of files and folders with other users.
Download Files/Folders: Permits downloading documents or folders.
Rename Files/Folders: Allows renaming of files or folders in the Drive.
Move to Trash: Enables moving files or folders to the trash.
8. Roles Management:
View Roles: Allows the role to see all existing roles.
Update Roles: Permits editing roles.
Create Roles: Enables the creation of new roles.
Delete Roles: Allows deleting roles that are no longer needed.
9. Automation:
Manage Automations: Allows the role to create, update, or delete automation workflows.
10. Billing Permissions:
View Billing Details: Grants access to view billing information for the organization.
Update Billing Details: Allows updating billing information, such as payment methods.
Finalizing the Role
Review the selected permissions to ensure they match the intended scope of the role.
Click Add Role to save the new role with the specified permissions.
Additional Tips and Best Practices
Use Role Descriptions: A clear description helps admins quickly identify the purpose of a role.
Grant Permissions Based on Need: Only assign permissions that are necessary for the role’s responsibilities to ensure security.
Review Regularly: Regularly audit roles and permissions to ensure alignment with changes in team responsibilities.
Common Issues and Troubleshooting
Issue: Unable to save the new role.
Solution: Ensure that all required fields, such as Role Name, are filled out, and at least one permission is selected.Issue: Permissions are not being applied to a user.
Solution: Verify that the user is assigned to the correct role. Log out and back in to refresh permissions.Issue: Error while editing permissions.
Solution: Make sure you have Admin privileges to modify role permissions.
Conclusion and Next Steps
Creating a new role in Zeninbox helps you tailor access levels to fit your organization’s structure, ensuring efficiency and security. Start by defining roles that match specific responsibilities and enhance team productivity. If you need assistance, contact Zeninbox support.