Settings in Zeninbox
Manage your preferences, customize features, and enhance your Zeninbox experience through the comprehensive settings panel.
Written By lucidgrowth
Last updated Over 1 year ago
Introduction
The Settings section in Zeninbox allows you to customize and manage various aspects of your account, ensuring it meets your workflow and security needs. From user preferences to organization-wide configurations, the Settings section helps you tailor Zeninbox to streamline your email management experience. Whether you're an individual user or an admin managing a team, the Settings section provides the tools to enhance productivity.
Key Features of Settings
Here’s an overview of the key settings you can manage:
User Settings:
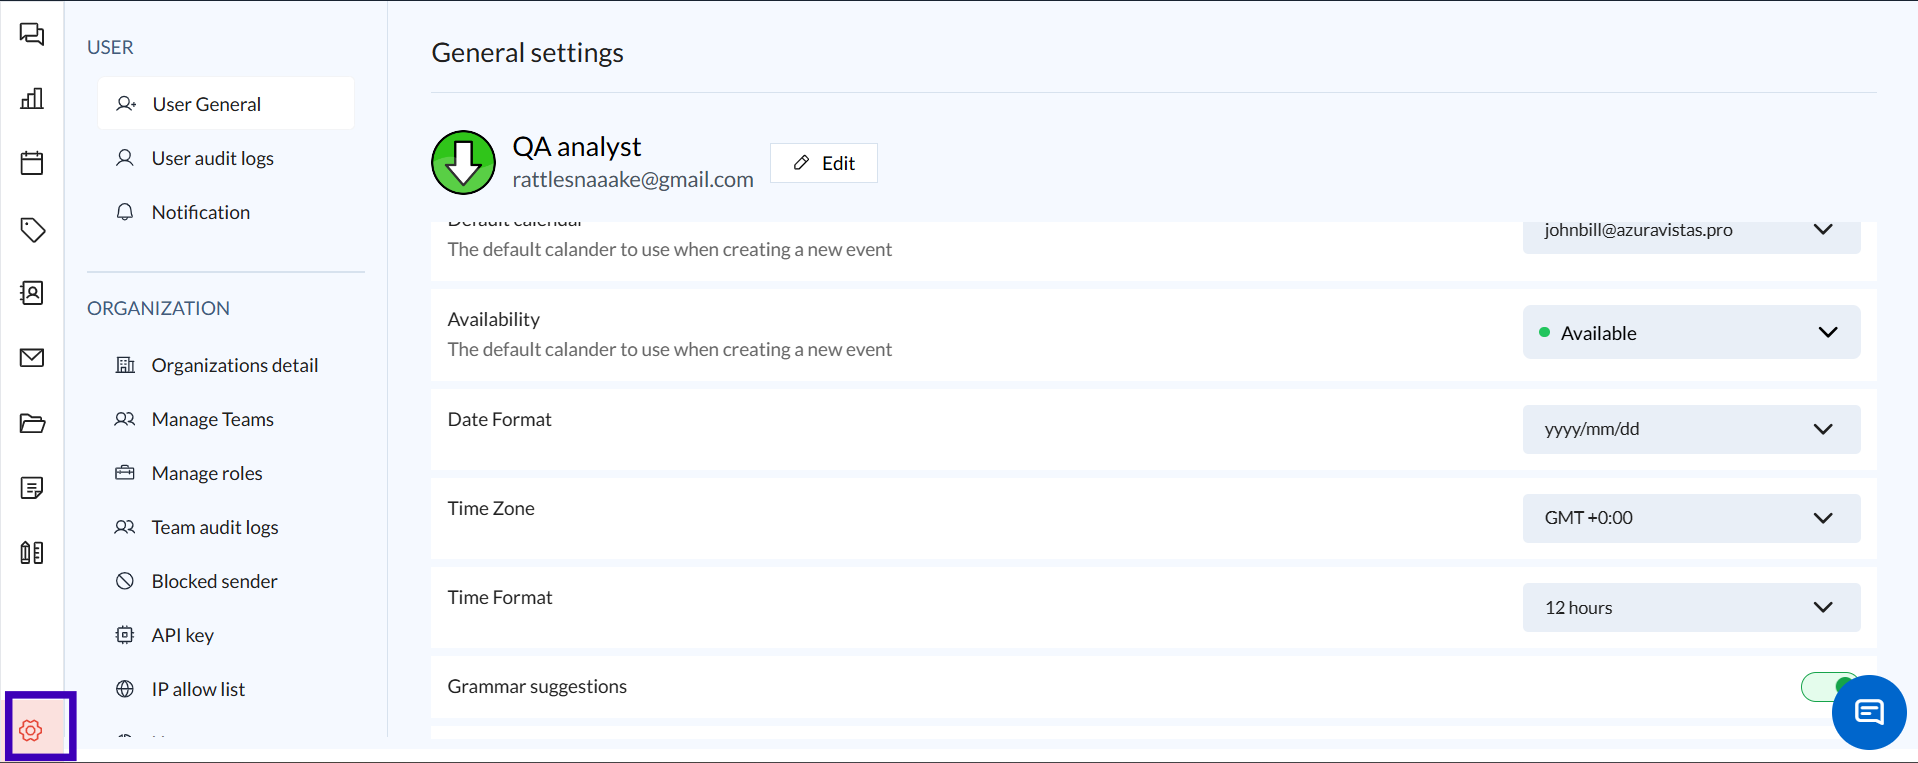
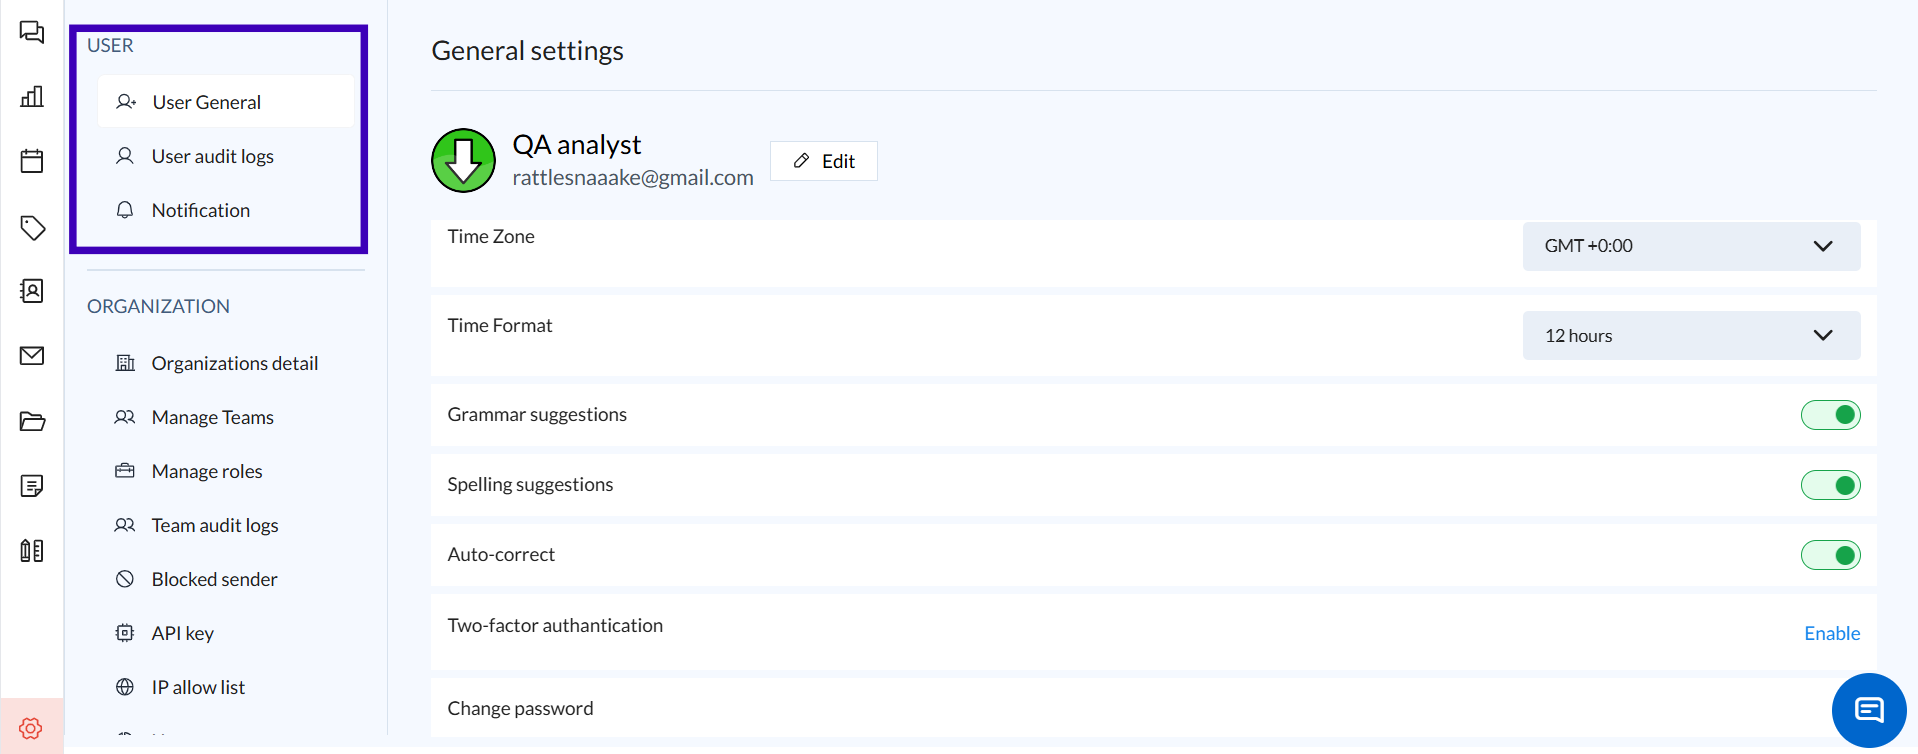
User General: Adjust individual preferences like the maximum page size, send button defaults, and notification sounds to match your style.
User Audit Logs: Track actions performed by individual users, ensuring transparency and accountability.
Notification: Manage notification preferences to stay informed about important updates and incoming messages.
Organization Settings:
Organization General: Configure organization-wide preferences, such as default settings for email viewing and calendar configurations.
Manage Teams: Add or remove team members, assign roles, and ensure each team member has the appropriate permissions.
Workspace: Customize workspace details and manage how it appears to team members.
Manage Roles: Define roles within the organization and control access to different features.
Integrations: Connect your favorite tools to streamline workflows and enhance productivity.
Team Audit Logs: Keep track of activities across the team to ensure proper use of resources.
Blocked Sender: Prevent emails from specific addresses or domains from reaching your inbox.
API Key Management: Integrate Zeninbox with other tools by managing API keys.
IP Allow List: Add IP addresses to ensure only authorized users can access your Zeninbox account.
Usage: Monitor your organization's usage to understand email volumes and storage.
Billing & Invoices: Manage subscription plans, view payment history, and download invoices.
LLM: Manage Large Language Model settings for AI-driven features.
Benefits of Customizing Settings
Enhanced Control: Settings enable users to control how they interact with Zeninbox, from notifications to email display preferences.
Improved Security: With options like two-factor authentication and IP allowlisting, you can ensure that your data remains secure.
Team Management: Easily manage team access and roles, ensuring that the right people have the right permissions.
Custom Workflow: Adjust settings to match your preferred workflow, making Zeninbox feel like a natural extension of your daily routine.
Step-by-Step Guide to Using Settings
Follow these steps to navigate and utilize the key features in the Settings section:
1. Accessing the Settings Page
Step 1: Log in to your Zeninbox account.
Step 2: Click the Settings Icon in the bottom left corner of the dashboard.
Step 3: This opens the Settings menu, where you’ll find options for User and Organization settings.
2. Adjusting User Preferences
Step 1: In the User section, click User General.
Step 2: Here, you can adjust settings such as Maximum Page Size, Send Button, and Notification Sound.
Step 3: Click Save to apply any changes.
3. Managing Team Access
Step 1: Go to the Organization section and select Manage Teams.
Step 2: Add or remove members, assign roles, and manage access levels.
Step 3: Ensure each member’s permissions align with their responsibilities.
4. Setting Up API Integrations
Step 1: Navigate to API Key under the Organization settings.
Step 2: Click Generate New Key and follow the instructions to integrate Zeninbox with other platforms.
Step 3: Store the API key securely and use it for integrating with third-party services.
5. Configuring IP Allow List
Step 1: In Organization settings, select IP Allow List.
Step 2: Click Add New IP and enter the IP address or range you wish to allow.
Step 3: Save the settings to ensure only authorized users can access Zeninbox.
Common Issues & FAQs
How do I change the default calendar?
Go to User General settings and select your preferred calendar from the Default Calendar dropdown.Why can’t I access team settings?
Ensure that you have the required permissions to access Manage Teams. Only admins or users with specific roles can modify these settings.How do I add an IP range to the allow list?
Navigate to Organization > IP Allow List and use the Add New IP feature. Enter the IP range to restrict access.
Conclusion & Next Steps
The Settings section is your control center for personalizing Zeninbox according to your needs. Whether you’re adjusting user preferences, managing teams, or enhancing security, the Settings section ensures that your Zeninbox experience is smooth and secure. For further assistance, contact our support team at support@zeninbox.ai.