IP allow list
Written By lucidgrowth
Last updated Over 1 year ago
Introduction
The IP Allow List feature in Zeninbox provides a way to control access to your organization’s data by allowing only specified IP addresses to access Zeninbox. This feature ensures that only users connecting from trusted networks can access your organization’s resources, enhancing security and reducing the risk of unauthorized access.
Purpose and Benefits:
Enhanced Security: Restrict access to your Zeninbox account to specific IP addresses, reducing the risk of unauthorized logins.
Compliance Management: Help meet compliance requirements by ensuring that data access is limited to specific, approved networks.
Controlled Access: Manage which office locations or secure networks can access Zeninbox, making it ideal for organizations with multiple branches or remote workers.
Prerequisites
Access to IP Information: Make sure you have the IP addresses or ranges that need to be allowed.
Important Note: Incorrectly configuring the IP allow list may result in users being unable to access Zeninbox from unapproved networks. Double-check all IP addresses before saving changes.
Step-by-Step Instructions
Follow these instructions to set up or manage the IP allow list in Zeninbox:
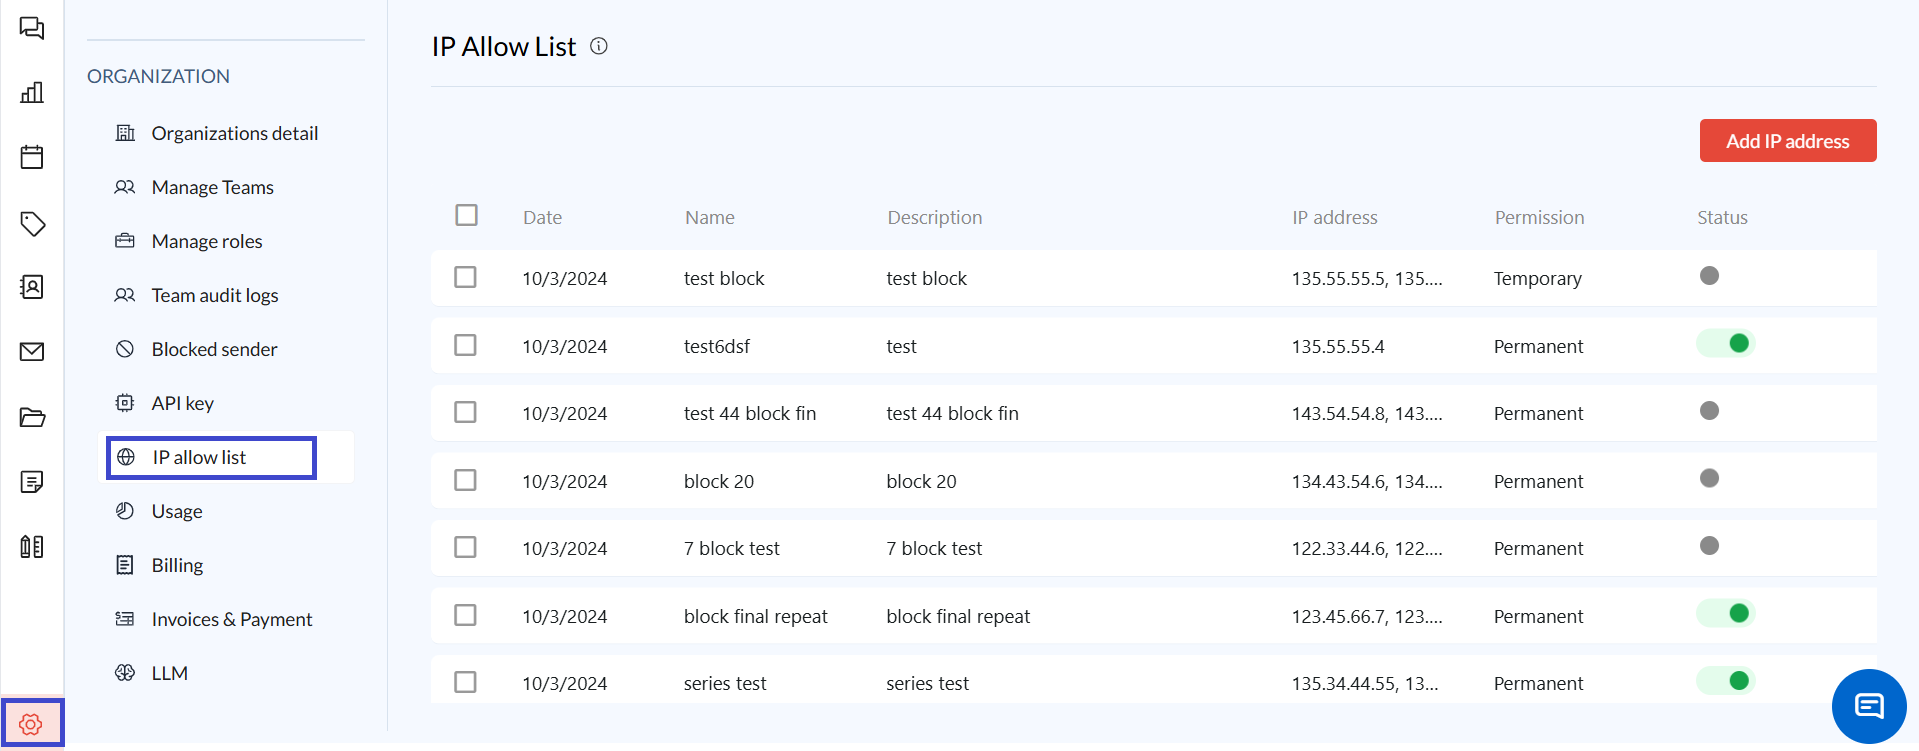
1. Access the IP Allow List Settings
Log in to your Zeninbox account and navigate to the Settings page.
Click on the IP Allow List tab to open the configuration page.
2. Add a New IP Address or Range
Click on the Add IP Address button.
Enter the IP address or range you want to allow access to. For example, enter a single IP like
192.168.1.1or a range like192.168.1.1-192.168.1.255.Provide a description for the IP address (e.g., Office Headquarters, Remote Team).
Add the IP address for temporary or permanent.
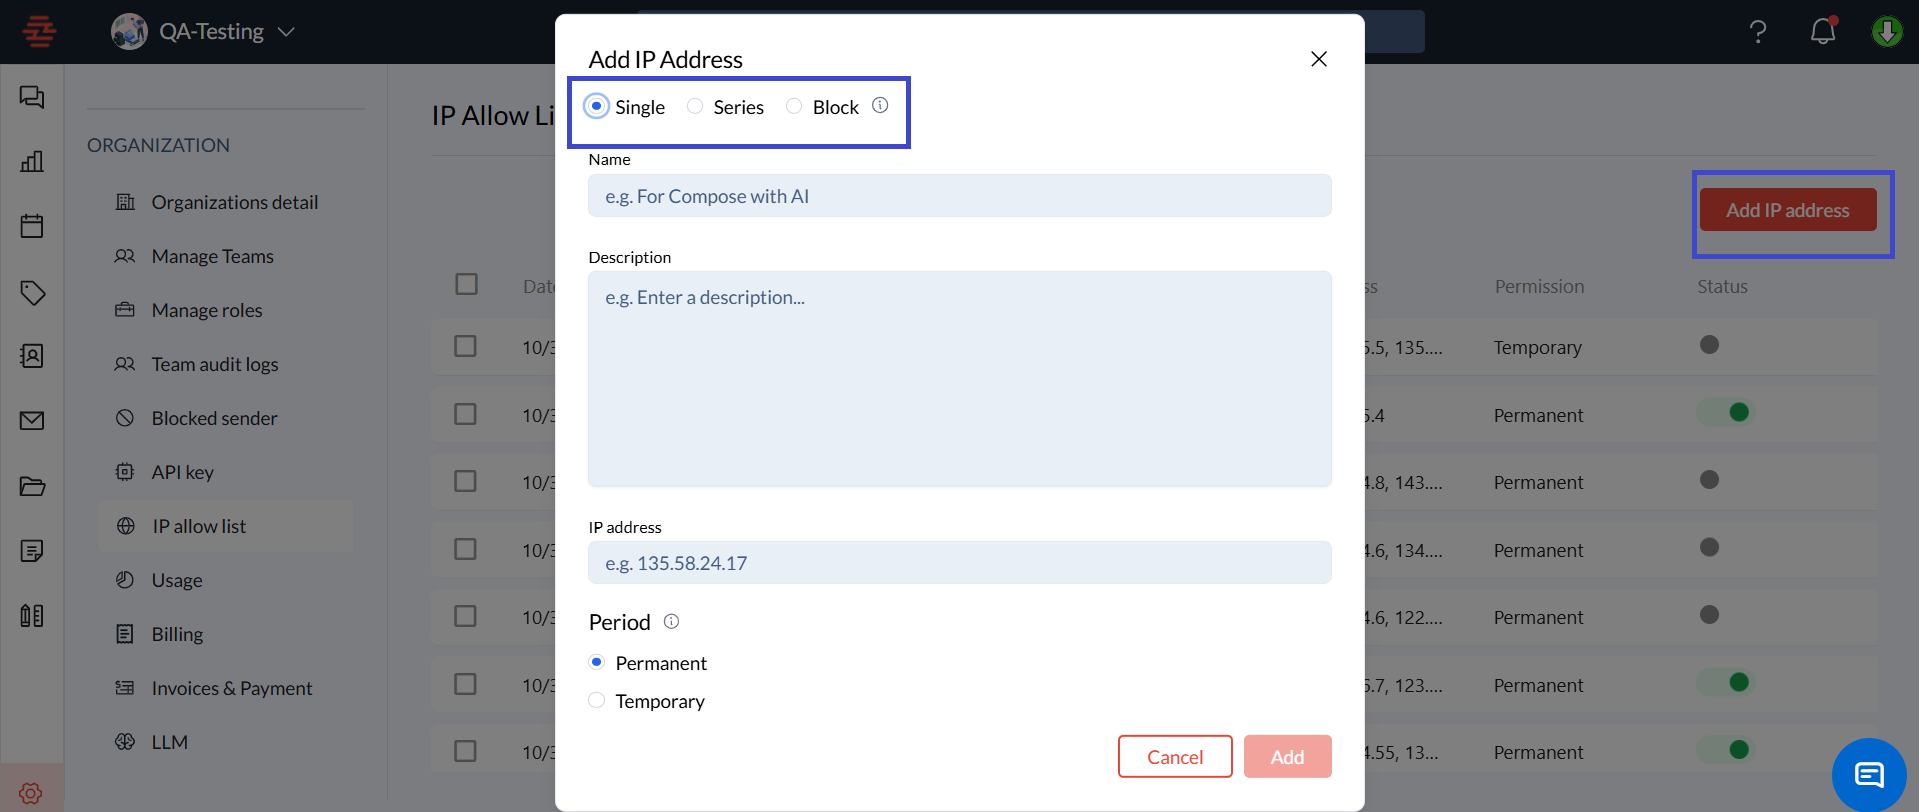
3. Save Changes
After adding the IP addresses, click the Add button to apply the changes.
The IP addresses you added will now appear in the list of allowed IPs.
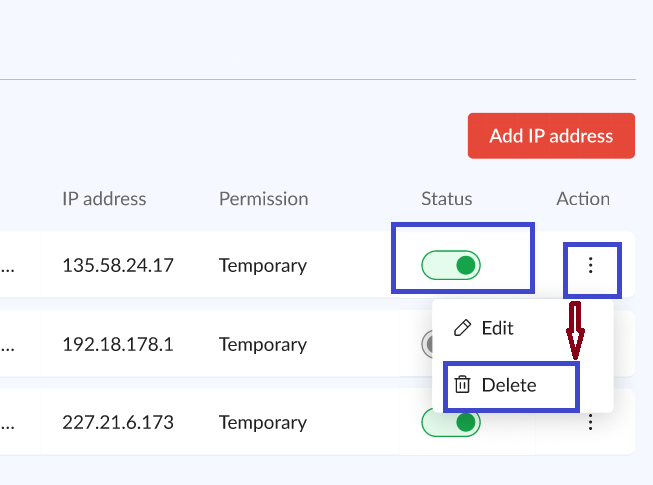
4. Edit or Remove an IP Address
To modify an existing IP address, click on the Edit icon next to the address in the list.
To remove an IP address from the allow list, click the Delete icon and confirm the action.
Common Issues and Troubleshooting
User Unable to Access Zeninbox:
Verify that their IP address is included in the allow list and that there are no typos.
Ensure the user is connecting from an IP that falls within the allowed range.
Cannot Add IP Range:
Confirm that the range is correctly formatted and does not overlap with existing entries.
Conclusion and Next Steps
The IP Allow List feature in Zeninbox is a powerful tool for controlling access to your organization’s data and ensuring that only trusted networks can connect. By setting up and managing your IP allow list, you can safeguard your data and maintain compliance with security requirements.
If you need further assistance, please reach out to our support team at support@zeninbox.ai.