How to Connect mailru with Zeninbox
Written By lucidgrowth
Last updated About 1 year ago
Introduction
Connecting your Mail.ru account to Zeninbox allows you to manage your Mail.ru emails along with other accounts within the Zeninbox interface. This integration provides a streamlined way to handle emails from multiple providers in one place. Follow this guide to set up your Mail.ru account with Zeninbox.
Prerequisites
Before you begin, make sure you have:
An active Mail.ru account.
IMAP access enabled in your Mail.ru account settings.
App-Specific Password: If you have two-factor authentication (2FA) enabled on your Mail.ru account, generate an app-specific password for third-party email clients like Zeninbox.
Step-by-Step Instructions
Step 1: Enable IMAP Access in Mail.ru
Log in to your Mail.ru account through a web browser.
Go to Settings > Email Programs.
Make sure that IMAP is enabled. This allows Zeninbox to connect to your Mail.ru account.
Step 2: Generate an App-Specific Password (If 2FA is Enabled)
In your Mail.ru account settings, go to the Security section.
Under App Passwords, select Generate Password for third-party apps.
Copy this app-specific password as you’ll need it in Zeninbox instead of your regular Mail.ru password.
Step 3: Open Mailbox Management in Zeninbox
Log in to Zeninbox.
Click on the Mailboxes icon in the left sidebar to access the Mailbox Management page.
Step 4: Start Adding a New Mailbox
On the Mailbox Management page, click Add Mailbox in the top right corner.
Select Add manually from the dropdown options.
Step 5: Choose IMAP/SMTP for Mail.ru
On the Add New Mailbox screen, select the IMAP/SMTP option to manually configure the Mail.ru email settings.

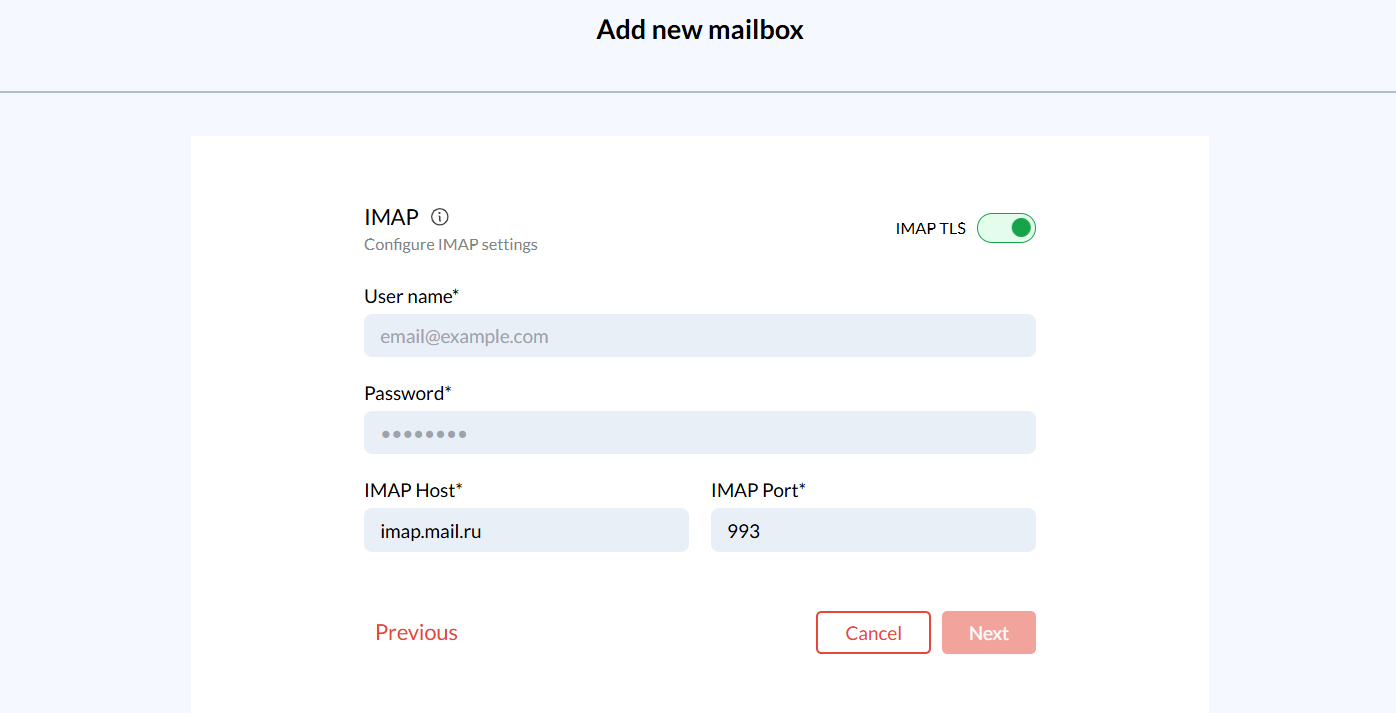
Step 6: Enter Mail.ru Mailbox Details
Fill in the following information to connect your Mail.ru account:
User Name: Enter your full Mail.ru email address (e.g.,
yourname@mail.ru).Password: Use the app-specific password if 2FA is enabled, or your regular Mail.ru password if not.
IMAP Host: Enter `
imap.mail.ru`.IMAP Port: Use port 993.
Step 7: Configure SMTP for Mail.ru
If you want to send emails via Mail.ru from Zeninbox, set up the SMTP settings:
SMTP Host: Enter `
smtp.mail.ru`.SMTP Port: Use port 465 (for SSL) or 587 (for TLS).
Click Next to continue.
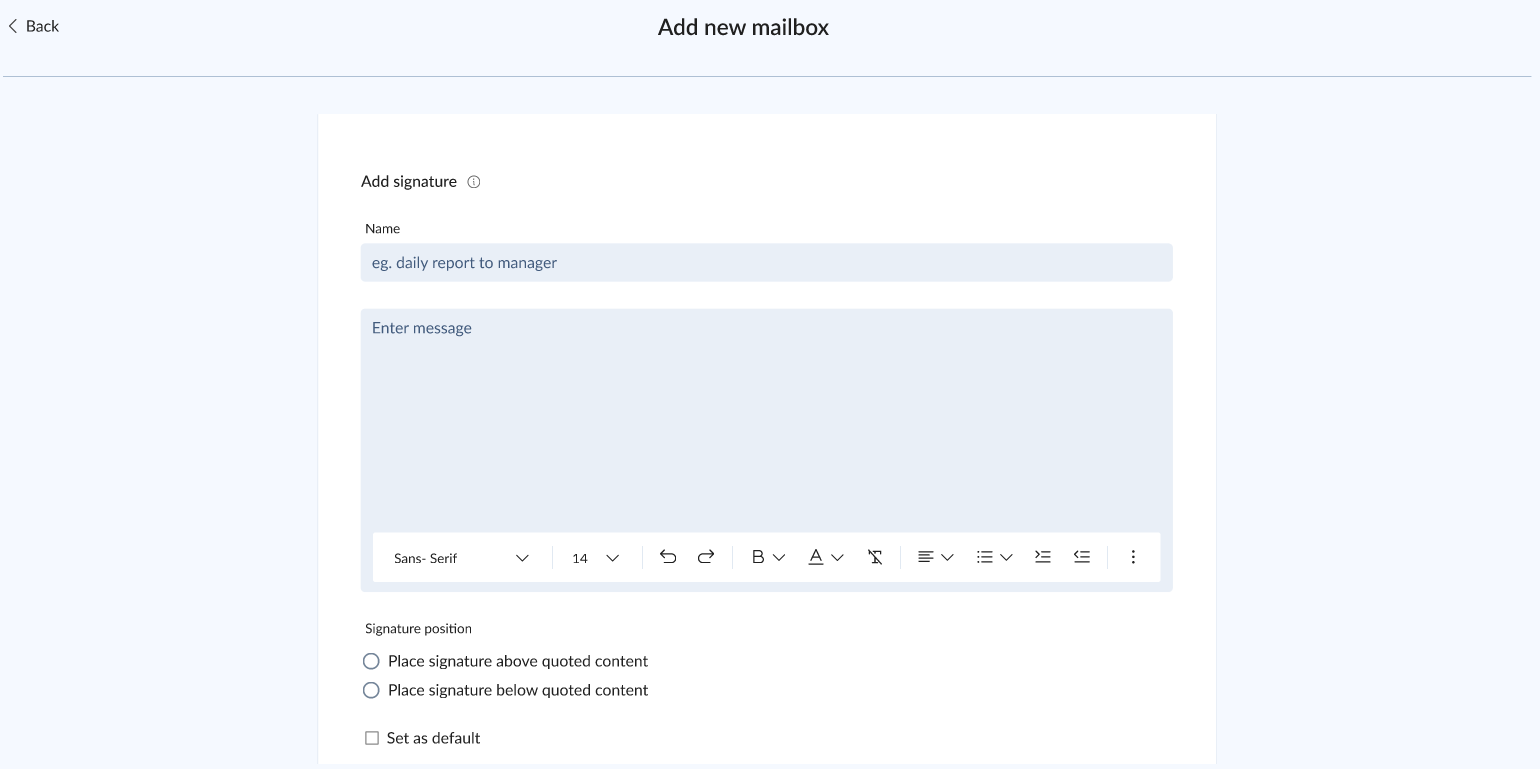
Step 8: Add a Signature
Zeninbox allows you to add a custom signature for each mailbox.
If desired, add a signature name and content here.
Step 9: Complete the Setup
Click Add to finalize the setup.
Return to the Mailboxes overview to confirm that your Mail.ru account appears as Active with a green status indicator.
Additional Tips and Best Practices
Organize with Labels: Assign a label, such as “Mail.ru,” to help you quickly identify emails from this account.
Manage Notifications: Customize notification settings to avoid being overwhelmed by alerts when managing multiple accounts.
Common Issues and Troubleshooting
Invalid Credentials: Ensure that you are using the app-specific password if 2FA is enabled.
Connection Timeouts: Double-check that the IMAP and SMTP host and port settings are correct. If issues persist, try disabling and re-enabling IMAP in your Mail.ru settings.
Conclusion
By following these steps, your Mail.ru account should now be successfully connected to Zeninbox, allowing you to manage it seamlessly within the unified interface. For more help or advanced configurations, check out the Zeninbox Help Center or reach out to Zeninbox support.