How to Add Contacts Manually in Zeninbox
Learn how to manually add new contacts in Zeninbox to keep your contact list up-to-date and organized.
Written By lucidgrowth
Last updated Over 1 year ago
Introduction
The Add Contact Manually feature in Zeninbox CRM Beta allows users to add individual or organizational contacts with detailed information. This method is perfect for adding new clients, prospects, or business partners that are not automatically captured through incoming emails.
Prerequisites
Access Level: Ensure you have permission to manage contacts within CRM Beta.
Important Note: Adding detailed information such as tags and custom fields can help in better categorization of contacts.
Step-by-Step Instructions for Adding Contacts Manually
Adding an Individual Contact
Access the CRM Beta section from the left-hand sidebar in Zeninbox.
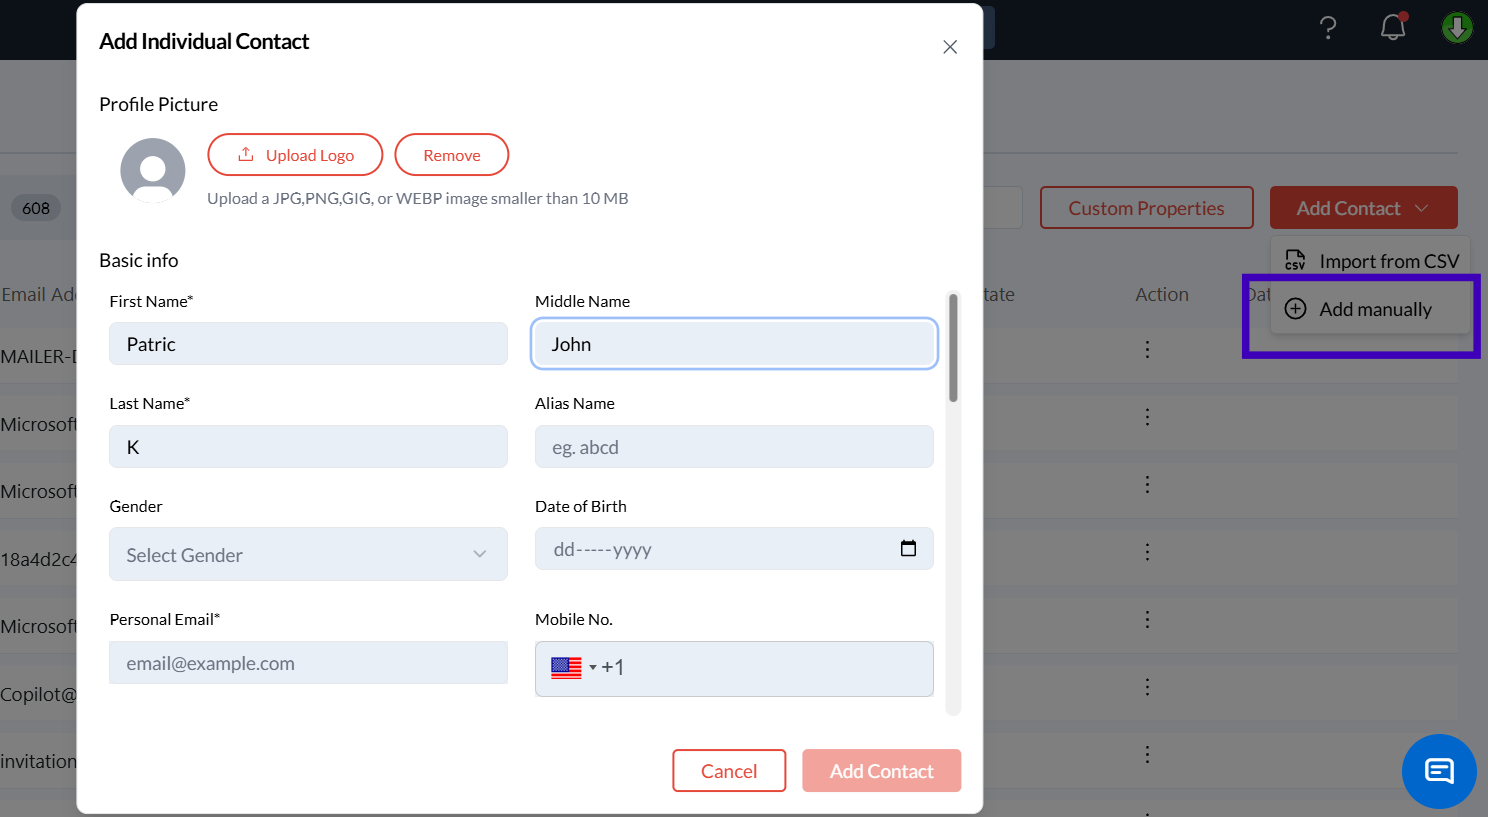
Click on the Add Contact button and select Add Manually.
Choose an Individual to add a personal contact.
Fill in the required details:
First Name and Last Name.
Personal Email: Email address for direct communication.
Mobile Number: Include the country code for accurate contact details.
Time Zone and Date of Birth for precise scheduling and follow-ups.
Add optional details like Gender, Professional Information, and Profile Picture.
Use Tags to categorize the contact (e.g., “VIP,” “Feedback”).
Click Save to create the contact entry.
The contact will now appear in the Individual tab, and all details will be visible.
Adding an Organization Contact
Click Add Contact and choose Add Manually.
Select Organization to add a business entity.
Input the necessary fields:
Company Name: The official name of the organization.
Industry: Type of industry the organization belongs to (e.g., “Tech,” “Automobile”).
Contact Information: Includes the Work Email and Phone Number.
Location Details: City, State, and Address for precise contact information.
Add Tags to help identify the organization’s role or engagement level (e.g., “Partner,” “Client”).
Click Save to add the organization to the CRM.
The organization will now be visible in the Organization tab with complete details.

Additional Tips and Best Practices
Use Tags Effectively: Tags help you quickly filter and categorize your contacts, making it easier to find them later.
Keep Profiles Updated: Regularly update contact information for accuracy.
Use Profile Pictures for Key Contacts: Adding profile pictures makes it easier to identify contacts at a glance.
Common Issues and Troubleshooting
Issue: Unable to save the contact.
Solution: Ensure all required fields, such as First Name and Email, are filled out. Check your internet connection.Issue: Tags are not appearing.
Solution: Confirm that the tags have been correctly added before saving the contact.
Conclusion and Next Steps
Adding contacts manually in CRM Beta allows you to customize the information you store for each client or organization, ensuring that all relevant details are captured. If you need further assistance, contact Zeninbox support.