Understanding Automation in Zeninbox
Learn how automation simplifies workflows in Zeninbox, helping you organize and manage similar emails efficiently and effortlessly.
Written By lucidgrowth
Last updated Over 1 year ago
Introduction
Automation in Zeninbox is designed to streamline your email management processes, allowing you to automate repetitive tasks and save valuable time. By setting up automation workflows, you can create rules to automatically categorize, prioritize, or respond to emails, reducing the manual effort needed to manage your inbox. This article explains the purpose and benefits of Zeninbox's automation features, how to set them up, and best practices for getting the most out of automation.
Purpose and Benefits
Why Use Automation in Zeninbox?
Save Time: Automate repetitive tasks like tagging, archiving, or forwarding emails, allowing you to focus on more important work.
Enhance Productivity: Automation can handle routine processes like sorting emails into specific folders or sending auto-replies, ensuring that nothing slips through the cracks.
Consistency: By automating email processes, you ensure that your inbox is always organized according to the same rules, minimizing errors and manual oversight.
Step-by-Step Instructions for Using Automation
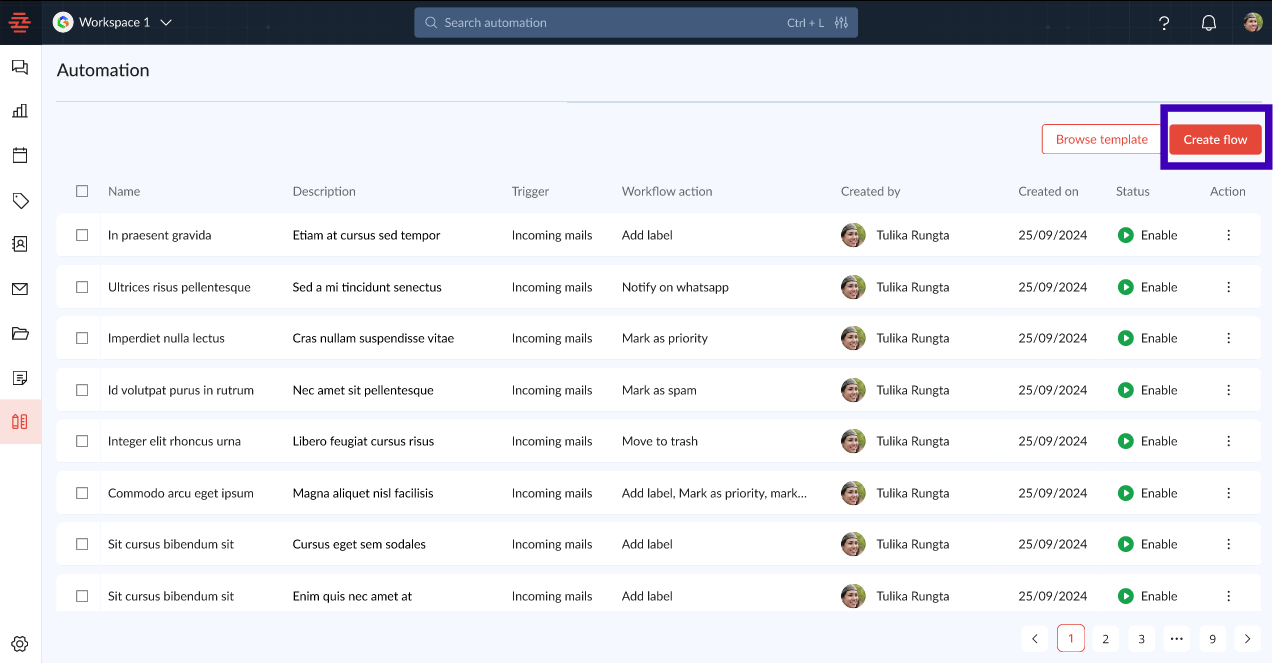
Step 1: Access the Automation Section
Log in to your Zeninbox account.
Navigate to the Automation tab in the sidebar.

Step 2: Create a New Automation Workflow
Click on "Create Flow" to start setting up a new automation rule.
Name your workflow to easily identify it later (e.g., "Tag Marketing Emails").
Step 3: Set Up Triggers
Choose a Trigger: Triggers are actions or events that initiate the workflow. For example:
Incoming Email: Trigger automation when a new email arrives.
Specific Keywords: Trigger when an email contains certain words (e.g., "Invoice" or "Meeting").
Customize the Trigger based on your needs, such as selecting specific senders or domains.

Step 4: Define Actions
Choose an Action: Actions determine what happens when a trigger occurs. Examples include:
Tag Email: Automatically apply a tag to incoming emails.
Archive Email: Move emails directly to the archive.
Send Auto-Reply: Set up an automatic response to specific emails.
Configure the Action with the necessary details, such as the tag name or reply message.
Include a screenshot of the Action configuration here.
Click "Save" to finalize your automation workflow.
Common Issues and Troubleshooting
Issue: "My workflow isn't triggering as expected."
Solution: Double-check your trigger conditions and ensure that the emails you expect to be affected match the criteria.
Issue: "The automation is applying actions to the wrong emails."
Solution: Refine your trigger keywords or sender specifications to ensure that only the desired emails are included.
Issue: "I can't create a new workflow."
Solution: Verify that your subscription plan includes automation capabilities and that you have the necessary permissions.
Conclusion and Next Steps
Zeninbox's automation features are designed to make managing your inbox easier and more efficient. By creating automation workflows, you can save time, enhance your productivity, and ensure a well-organized email environment.
Try creating your first automation today and experience how it can simplify your workflow.
If you need further support, please reach out to our support team via Email Support.