Understanding CRM Custom Fields in Zeninbox
Written By lucidgrowth
Last updated Over 1 year ago
Introduction
Custom fields in Zeninbox’s CRM provide the flexibility to store additional information about your contacts, leads, and opportunities. These fields help tailor the CRM to better meet the unique needs of your business. With custom fields, you can track any data that might not be included in the default fields, allowing for a more personalized and efficient CRM experience. This guide will walk you through the process of adding and managing custom fields in Zeninbox.
Key Features of CRM Custom Fields
Variety of Data Types: Choose from different field types, such as text, number, date, and dropdown, to ensure your data is captured in the best format.
Customizable Lengths: Set limits for data input, such as the maximum length for a text or numeric field, ensuring consistency in your entries.
Editable and Removable: Modify or remove custom fields as your business needs to evolve, providing full control over the data you store.
Seamless Integration: Easily integrate custom fields with your existing workflows and automation in Zeninbox.
Step-by-Step Guide to Adding Custom Fields
Step 1: Navigate to the CRM Custom Properties
Go to the CRM section in Zeninbox.
Click on Custom Properties to access the settings for creating and managing custom fields.
Step 2: Add a New Custom Property
Click on the Custom Property button to open the custom field creation window.
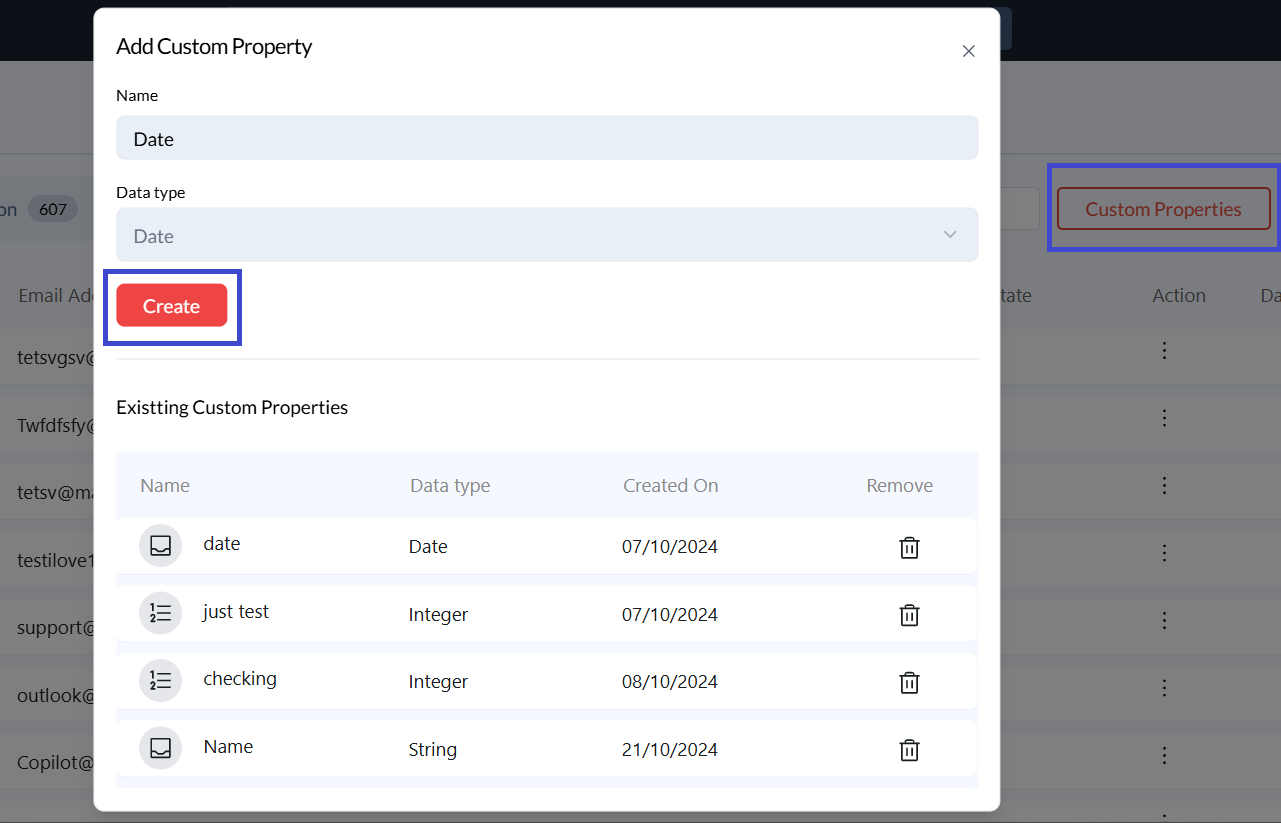
Fill in the following details:
Name: Enter a name for your custom property (e.g., "Contract Type").
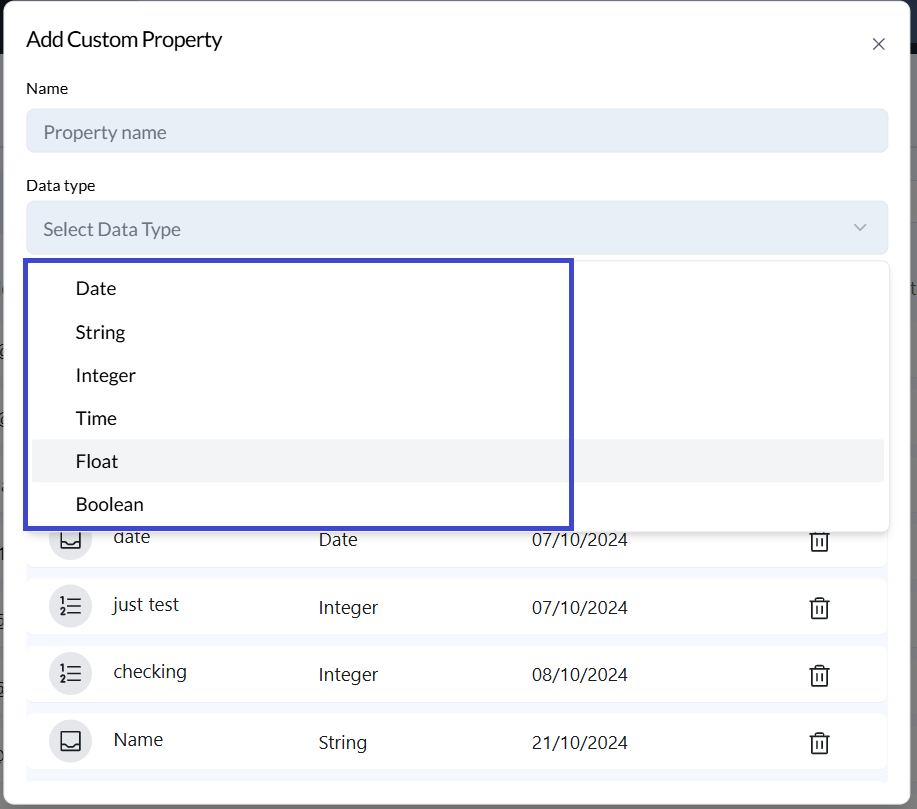
Data Type: Select the type of data you wish to store (e.g., String, Integer, Date).
Length: Specify the maximum length for the data if applicable (e.g., max 15 digits for numerical fields).
Click Create to save the new custom field.
Step 3: View and Manage Existing Custom Fields
Once a custom field is created, it will appear under the Existing Custom Properties section.
You can view details such as the name, data type, and creation date.
To remove a field, click the Trash icon next to the field you want to delete. Note that this action is irreversible, and any data stored in this field will be permanently removed.
Step 4: Use Custom Fields in Contact Records
Open a contact or lead record from the CRM section.
You will see the custom fields under the Custom Fields section of the record.
Enter the relevant information into each custom field and click Save to update the record.
Common Issues and FAQs
Why isn’t my new custom field showing up in contact records?
Ensure that the custom field is properly created and associated with the correct CRM module (e.g., contacts, leads). You may need to refresh the page.Can I change the data type of an existing custom field?
No, data types cannot be modified after creation. You will need to create a new custom field if the data type needs to be changed.How do I delete a custom field without losing data?
It’s important to back up any data stored in the custom field before deletion. Once deleted, the data cannot be recovered.
Conclusion
Custom fields in Zeninbox's CRM offer a flexible way to track and manage unique information, helping you create a more tailored and efficient CRM experience. By following the steps above, you can easily add, manage, and use custom fields to meet your business needs. For more information on optimizing your CRM setup, refer to our Advanced CRM Configuration Guide or reach out to our support team.